AlloyDB Cloud Instance
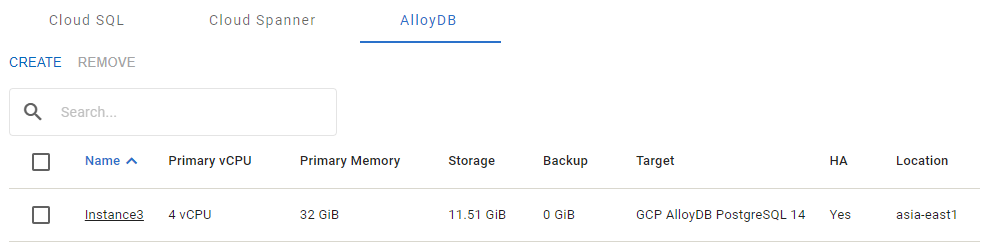
The AlloyDB tab
The AlloyDB cloud instance has the following properties:
HA
Flag indicating whether the instance is configured with the high availability feature.
All AlloyDB instances are configured with the high availability feature. The flag is displayed because high availability is the factor that affects costs.
Add Instance
To add an AlloyDB cloud instance:
In the AlloyDB tab, press the Create button.
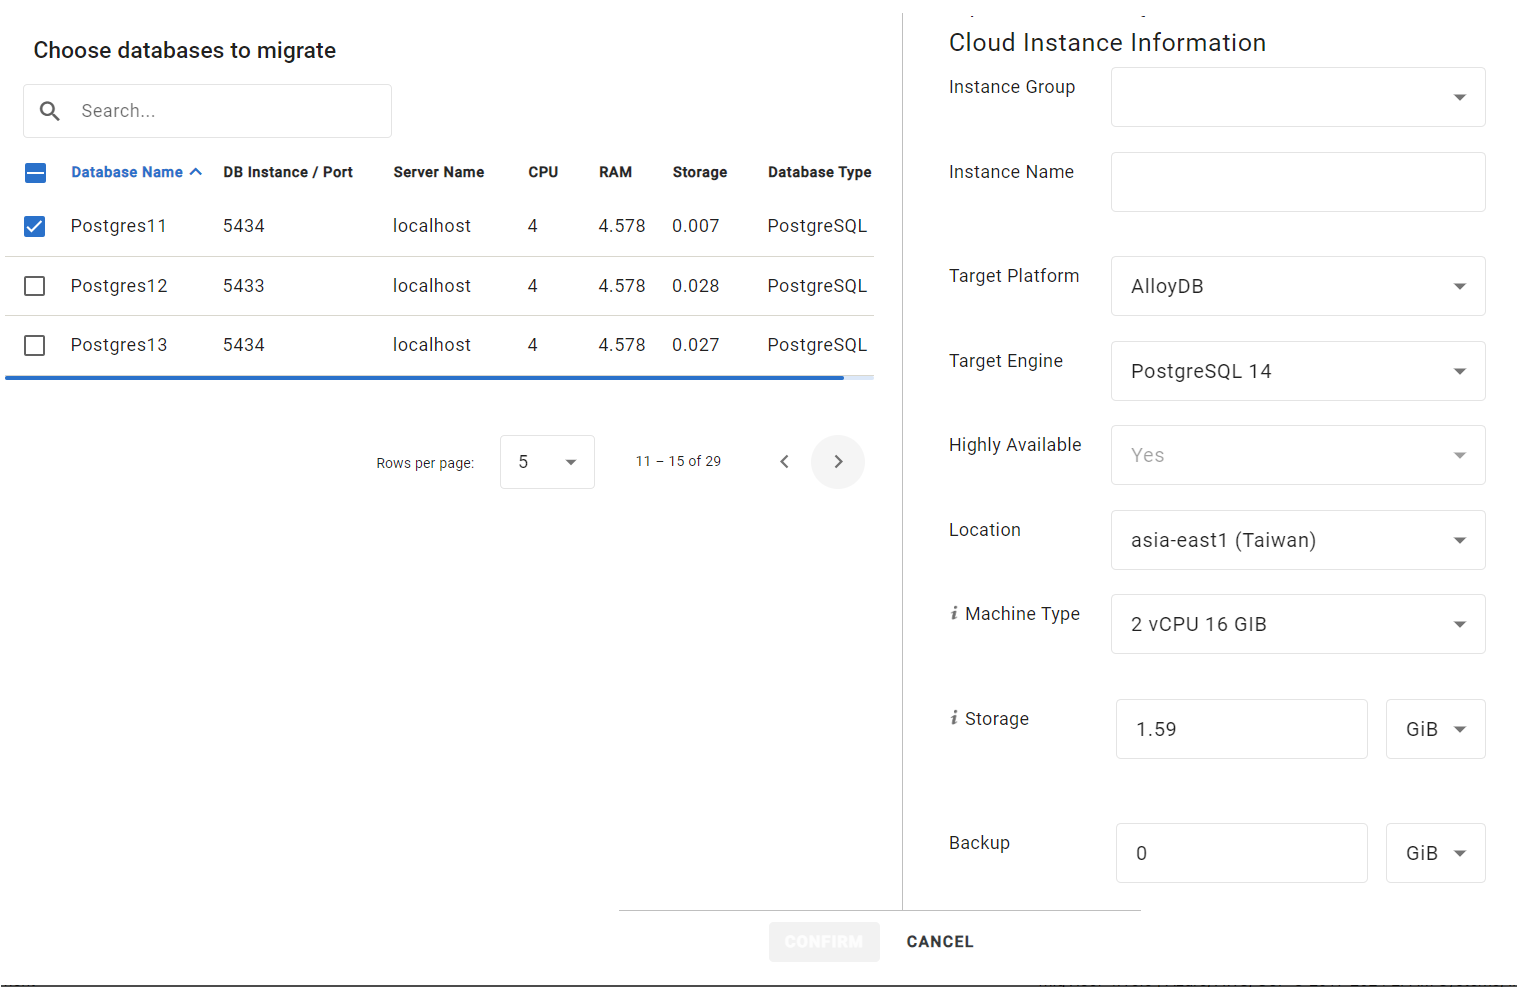
In the Choose databases to migrate panel, select the sources to migrate to the cloud instance.
In the Cloud Instance Information panel, specify:
Instance Group
Instance Name
Target Platform: AlloyDB.
Target Engine
Location
Machine Type
Backup
Press the Confirm button to save the configuration, or the Cancel button to discard it.
The Instance Configuration dialog
Resource Limits
The Machine Type and Storage resources are calculated automatically based on the sources selected for migration but can be manually set to a greater value.
In the Database Instances tab, when attempting to add an extra source that would exceed the resource limits of an existing instance, both the instance name in the Instance list and the Confirm button become gray and disabled.
Remove sources until the limitation indicators disappear in order to proceed.